Tutorials/Animated Textures
Preface
This tutorial will teach you how to make animated textures for Cobblemon using the layers system. Knowledge of creating custom Pokémon and frame-by-frame animation is recommended. A base model with textures is required.
Step 1: Choose the location of the animated textures
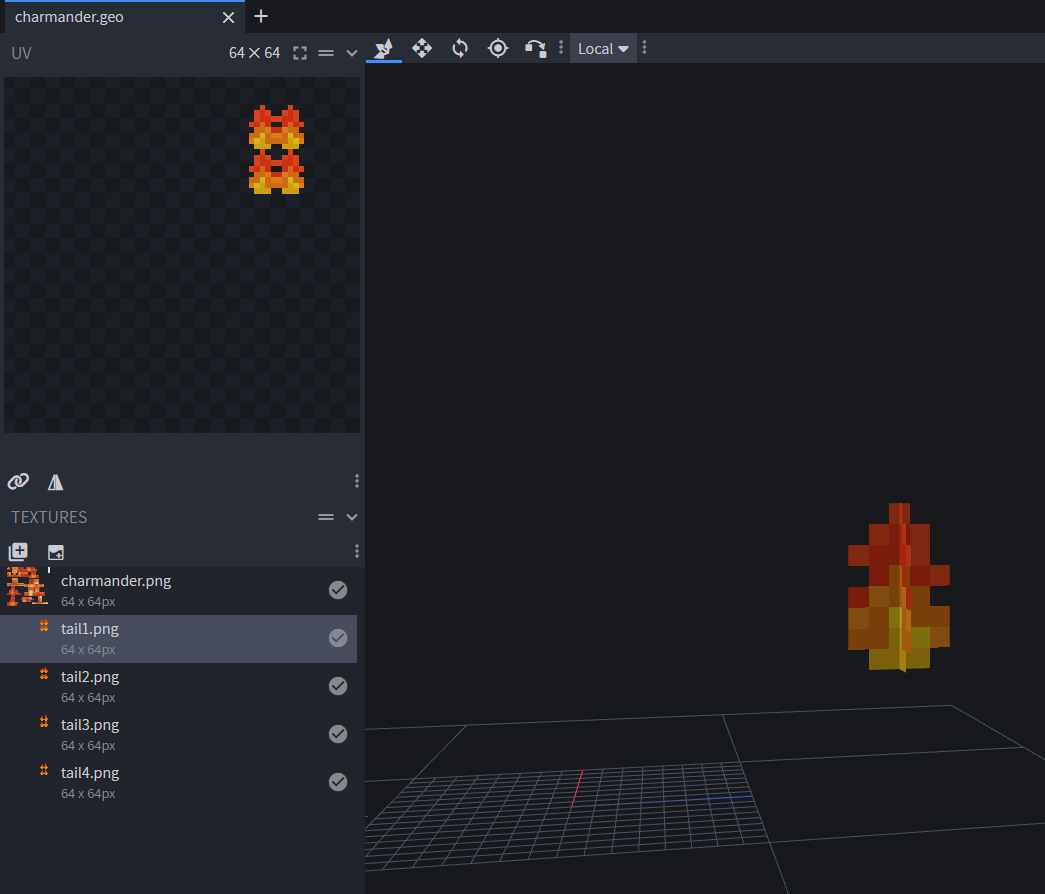
The location of your animated textures on the Pokémon will vary for each model. Remember that these textures are layers over the original texture, so they will be following the same UV map from the model you choose. Sometimes you may want visible body parts to have an animated texture, like Elgyem's color changing hands. Other times, you might want to create specific bones for flames on a Pokémon, like Charmander's tail.
- Decide what bones will receive animated textures and ensure they have the proper UV map for your idea
If you need some examples for how to set up your model for animated textures, you can reference some of the following Pokémon files. Be sure to load their model and all their textures in Blockbench. Each animation frame PNG should appear somewhere on the model.
Pokémon with animated textures and their files for reference:
- Charmander line
- Emboar
- Elgyem line
Step 2: Create each frame of the animation
The animated textures are played frame-by-frame, so you must create a PNG for each frame. The frames can be created in your preferred art software instead of Blockbench. Keep in mind that these frames may later be tagged as Emissive and Translucent.
Load your model in Blockbench and follow these steps:
- Click on "Create Texture" or press Ctrl+Shift+T.
- Name the texture
frame<frame #>. - Change the type to blank.
- Click confirm. The resolution of the original texture should be retained.
- On this new blank PNG, paint one frame of the animation.
- Repeat these steps until your animation is finished. A minimum of 3 frames is recommended.
- Repeat the entire process for your shiny textures (optional).
Cycling through each frame PNG in sequence can help you visualize how the animation will look in game.
Step 3: Add the new textures to a resource pack
You can simply place the set of PNGs in the target Pokémon's texture folder. Gather your new files and locate your Pokémon's resource pack, or make one if you haven't already. Refer to this custom Pokémon tutorial if you wish to learn how to make the resource pack mentioned in this step.
- Create a new folder and name it
animation. - Place all animation PNGs inside of this new folder.
- Place this new folder in the target Pokémon's texture folder.
The textures should be arranged in the resource pack folder like so:
- (resource pack name)
- assets
- cobblemon
- textures
- pokemon
- (target pokemon)
- animation
- frame1.png
- frame2.png
- frame3.png
- (pokemon).png
- (pokemon)_emissive.png
- (pokemon)_shiny.png
- (pokemon)_shiny_emissive.png
- animation
- (target pokemon)
- pokemon
- textures
- cobblemon
- assets
Step 4: Assign the animation textures to the resolver file
Now that textures are finished, you can assign them to the model they were made for through the resolver file. The whole set of PNGs will be assigned as a layer applied over the normal texture PNG. Layered textures can have several properties applied to them. For the purpose of this tutorial, we will apply the properties for frames,loop, and fps.
- Open your Pokémon's resolver JSON in your preferred text editor.
- Insert the string for "layers" with the following data:
"layers": [
        {
          "name": "animation",
          "texture": {
            "frames": [
              "cobblemon:textures/pokemon/<target pokemon folder>/animation/frame1.png",
              "cobblemon:textures/pokemon/<target pokemon folder>/animation/frame2.png",
              "cobblemon:textures/pokemon/<target pokemon folder>/animation/frame3.png"
            ],
            "fps": 5,
            "loop": true
          }
        }
]- Insert the data again but for your shiny version. (optional)
- Save your changes to the resolver file.
Make sure all the PNGs you created are in that list of frames! If desired, you may include the layer properties for emissive and translucent. This will allow your Pokémon's textures to appear animated and glowing!
When finished, your Pokémon's resolver should resemble this portion of Emboar's:
{
      "aspects": [],
      "poser": "cobblemon:emboar",
      "model": "cobblemon:emboar.geo",
      "texture": "cobblemon:textures/pokemon/0500_emboar/emboar.png",
      "layers": [
        {
          "name": "flame",
          "texture": {
            "frames": [
              "cobblemon:textures/pokemon/0500_emboar/flame/emboar1.png",
              "cobblemon:textures/pokemon/0500_emboar/flame/emboar2.png",
              "cobblemon:textures/pokemon/0500_emboar/flame/emboar3.png"
            ],
            "fps": 6,
            "loop": true
          },
          "emissive": true
        }
      ]
    }
Step 5: Test your textures in game
You may proceed to test your resource pack in game. You can have Blockbench open to edit the PNGs in the resourcepacks folder if needed.
- Copy your pack folder and place it in the "resourcepacks" folder in the Minecraft root directory.
- If your textures are for a custom Pokémon, then also copy your addon folder and place it in the "datapacks" folder of your world in the Minecraft root directory if it is not already.
- Start up Minecraft and click on Options, then Resource Packs. Select your pack to load it.
- Load/create a world save that contains Cobblemon.
- If applicable, load the world with your custom Pokémon addon in the "datapacks" folder.
- Once in the world, you can run the command
/pokespawn <target pokemon>. - Ensure your new animated textures are working properly.
- Make any desired edits to the PNGs and save. Refresh resource packs with F3+T to see the changes you make.
Your Pokémon should have some sort of animation! If the layers were tagged as emissive, then those animated textures should also glow in the dark!
