Berry Tree: Difference between revisions
mNo edit summary |
|||
| (169 intermediate revisions by 10 users not shown) | |||
| Line 1: | Line 1: | ||
{{InfoboxBlock|title=Berry Tree|image=Oran Berry | {{InfoboxBlock | ||
|title=Berry Tree | |||
|image=Oran Berry (block, stage 4).png | |||
|image2=Cheri Berry (block, stage 4).png | |||
|image3=Chesto Berry (block, stage 4).png | |||
|image4=Pecha Berry (block, stage 4).png | |||
|image5=Rawst Berry (block, stage 4).png | |||
|image6=Aspear Berry (block, stage 4).png | |||
|image7=Persim Berry (block, stage 4).png | |||
|image8=Razz Berry (block, stage 4).png | |||
|image9=Bluk Berry (block, stage 4).png | |||
|image10=Nanab Berry (block, stage 4).png | |||
|image11=Wepear Berry (block, stage 4).png | |||
|image12=Pinap Berry (block, stage 4).png | |||
|image13=Occa Berry (block, stage 4).png | |||
|image14=Passho Berry (block, stage 4).png | |||
|image15=Wacan Berry (block, stage 4).png | |||
|image16=Rindo Berry (block, stage 4).png | |||
|image17=Yache Berry (block, stage 4).png | |||
|image18=Chople Berry (block, stage 4).png | |||
|image19=Kebia Berry (block, stage 4).png | |||
|image20=Shuca Berry (block, stage 4).png | |||
|image21=Coba Berry (block, stage 4).png | |||
|image22=Payapa Berry (block, stage 4).png | |||
|image23=Tanga Berry (block, stage 4).png | |||
|image24=Charti Berry (block, stage 4).png | |||
|image25=Kasib Berry (block, stage 4).png | |||
|image26=Haban Berry (block, stage 4).png | |||
|image27=Colbur Berry (block, stage 4).png | |||
|image28=Babiri Berry (block, stage 4).png | |||
|image29=Chilan Berry (block, stage 4).png | |||
|image30=Roseli Berry (block, stage 4).png | |||
|image31=Leppa Berry (block, stage 4).png | |||
|image32=Lum Berry (block, stage 4).png | |||
|image33=Figy Berry (block, stage 4).png | |||
|image34=Wiki Berry (block, stage 4).png | |||
|image35=Mago Berry (block, stage 4).png | |||
|image36=Aguav Berry (block, stage 4).png | |||
|image37=Iapapa Berry (block, stage 4).png | |||
|image38=Sitrus Berry (block, stage 4).png | |||
|image39=Touga Berry (block, stage 4).png | |||
|image40=Cornn Berry (block, stage 4).png | |||
|image41=Magost Berry (block, stage 4).png | |||
|image42=Rabuta Berry (block, stage 4).png | |||
|image43=Nomel Berry (block, stage 4).png | |||
|image44=Enigma Berry (block, stage 4).png | |||
|image45=Pomeg Berry (block, stage 4).png | |||
|image46=Kelpsy Berry (block, stage 4).png | |||
|image47=Qualot Berry (block, stage 4).png | |||
|image48=Hondew Berry (block, stage 4).png | |||
|image49=Grepa Berry (block, stage 4).png | |||
|image50=Tamato Berry (block, stage 4).png | |||
|image51=Spelon Berry (block, stage 4).png | |||
|image52=Pamtre Berry (block, stage 4).png | |||
|image53=Watmel Berry (block, stage 4).png | |||
|image54=Durin Berry (block, stage 4).png | |||
|image55=Belue Berry (block, stage 4).png | |||
|image56=Kee Berry (block, stage 4).png | |||
|image57=Maranga Berry (block, stage 4).png | |||
|image58=Hopo Berry (block, stage 4).png | |||
|image59=Liechi Berry (block, stage 4).png | |||
|image60=Ganlon Berry (block, stage 4).png | |||
|image61=Salac Berry (block, stage 4).png | |||
|image62=Petaya Berry (block, stage 4).png | |||
|image63=Apicot Berry (block, stage 4).png | |||
|image64=Lansat Berry (block, stage 4).png | |||
|image65=Starf Berry (block, stage 4).png | |||
|image66=Micle Berry (block, stage 4).png | |||
|image67=Custap Berry (block, stage 4).png | |||
|image68=Jaboca Berry (block, stage 4).png | |||
|image69=Rowap Berry (block, stage 4).png | |||
|image70=Eggant Berry (block, stage 4).png | |||
}} | |||
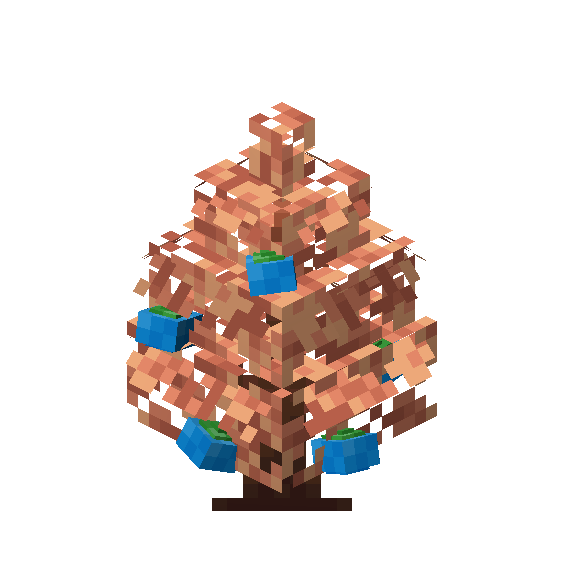
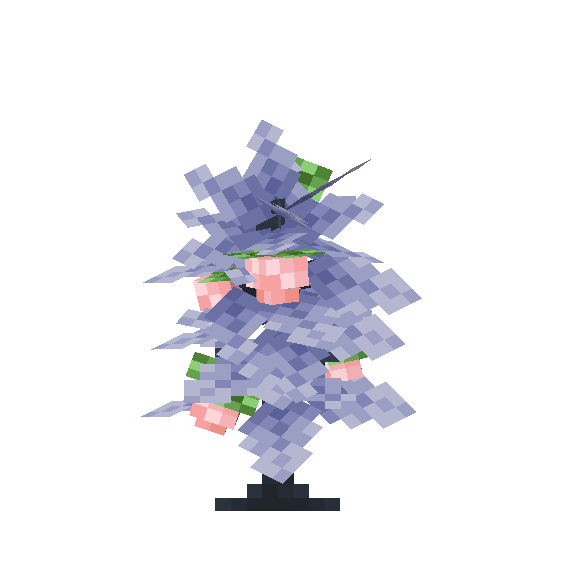
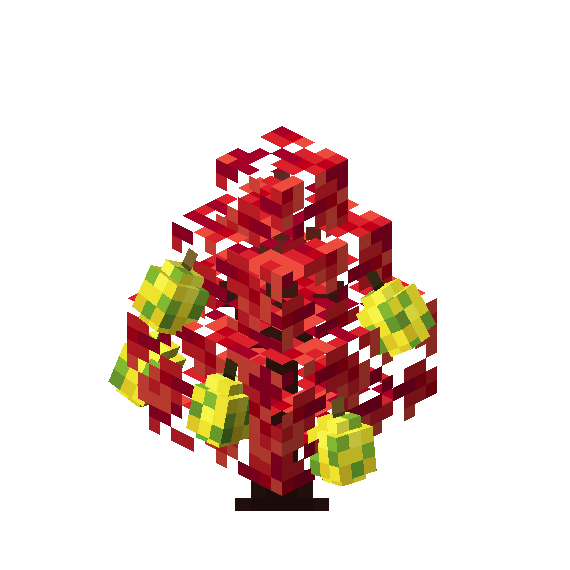
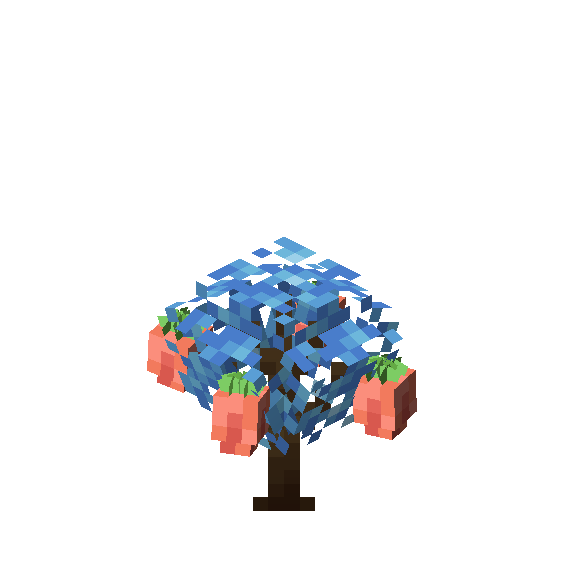
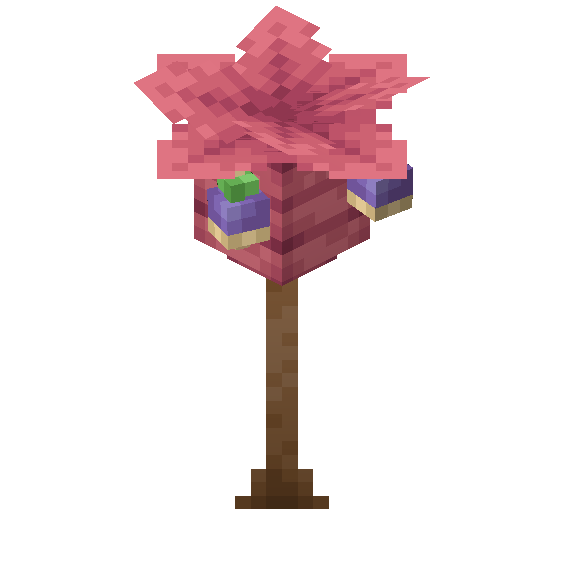
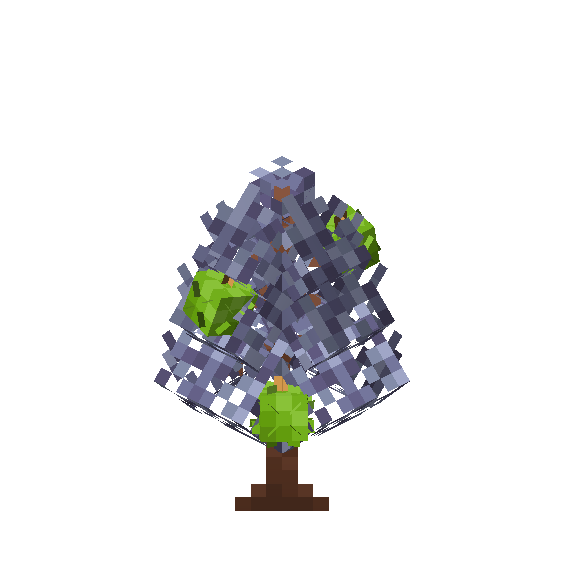
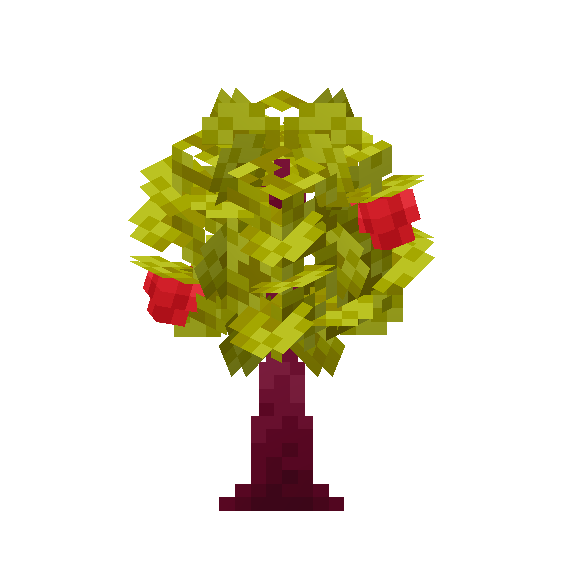
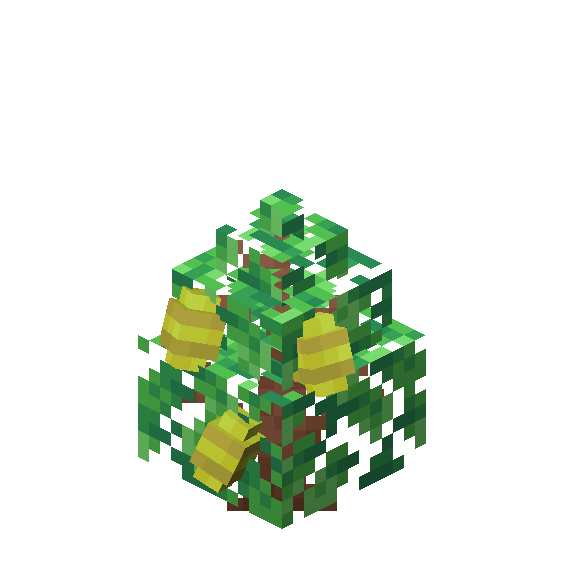
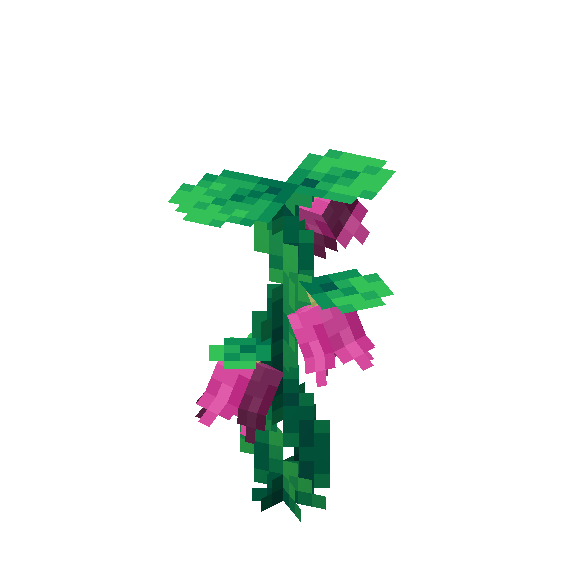
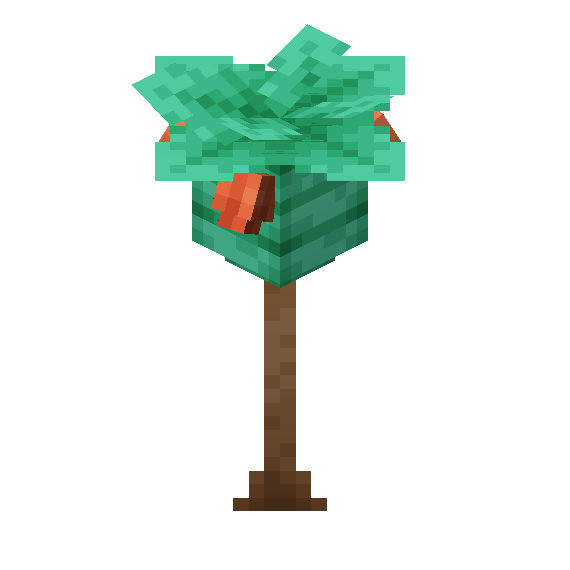
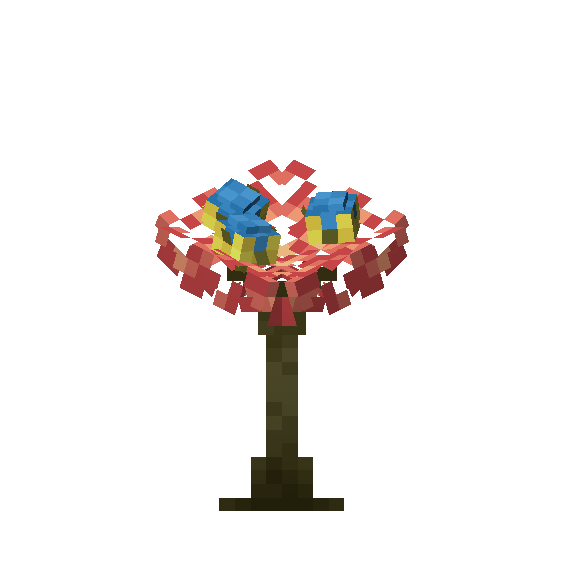
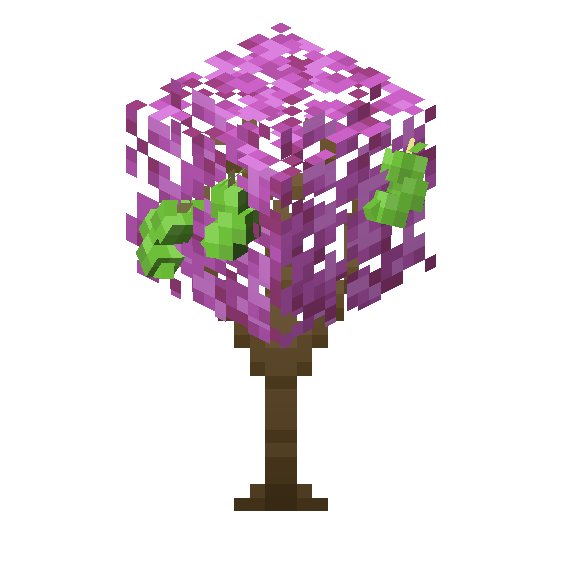
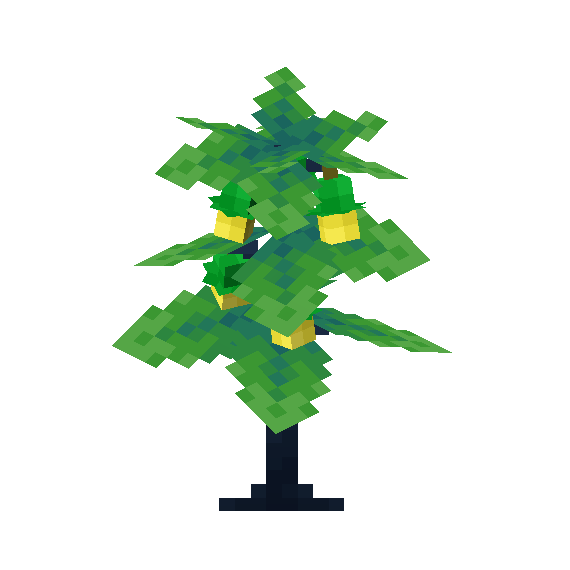
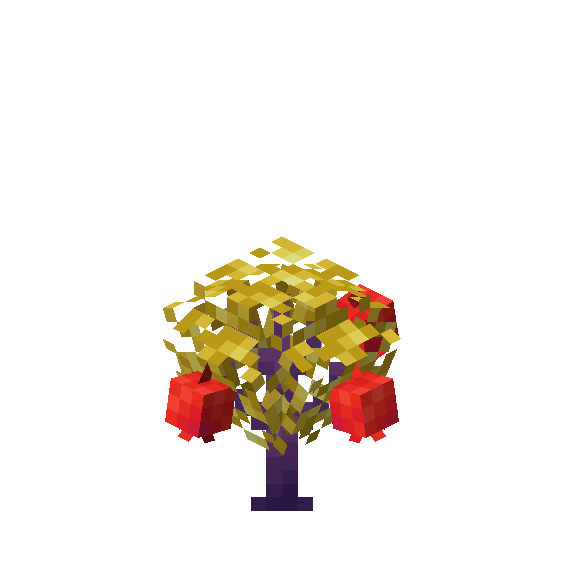
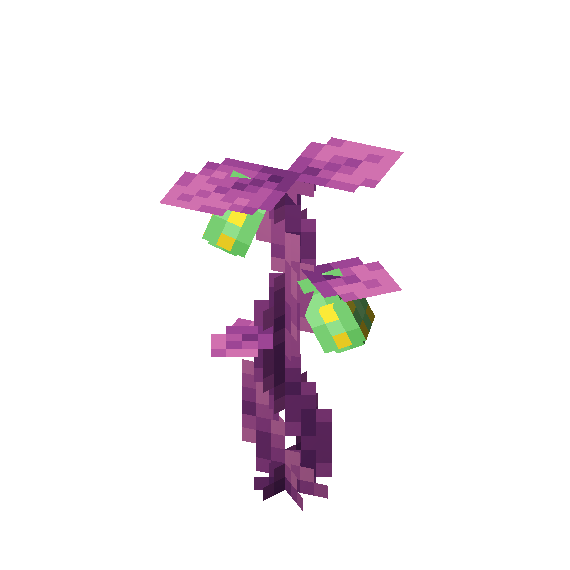
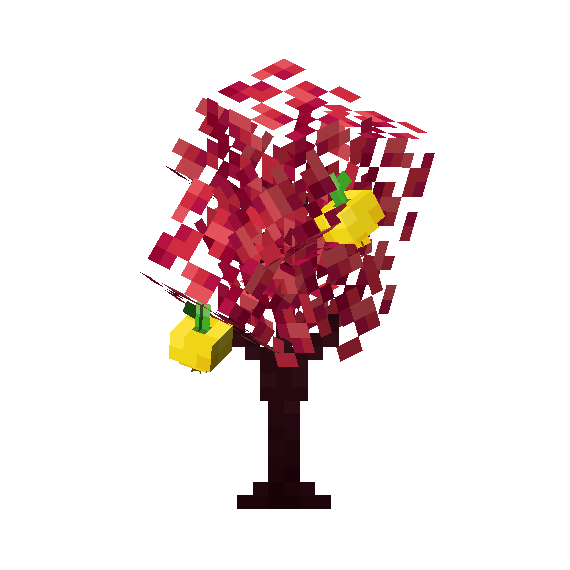
'''Berry Trees''' are a type of plant that yields the player [[Berry|berries]] when harvested. On occasion, a berry farm will spawn in place of a normal vanilla village farm. There are currently 30 unique berries that spawn naturally, and 39 obtained through berry mutations. | |||
==Berry Farming== | ==Berry Farming== | ||
Berries can be planted on any Farmland blocks. After being placed, they go through four stages of growth, with the final stage producing flowers on the plant that eventually turn into berries. Interacting with a fruiting berry tree will yield a varying amount of berries, which will replenish naturally over time. Berry trees can also be harvested by powering a redstone dispenser containing shears. | |||
Berry yields can be increased by either planting berries in their preferred biomes, or using the berry's preferred mulch on the soil after planting it. | |||
== Advancements == | |||
{| class="wikitable" | |||
! colspan="3" |Cobblemon 1.4.1 | |||
|- | |||
|'''An Unexpected Result''' | |||
|Goal | |||
|''"Plant Berry Trees of different types next to each other and witness Mutation in action."'' | |||
|} | |||
== Preferred Soil == | |||
Each type of berry tree yields more berries when grown in the soil of its preferred biome. Depending on the berry tree, this bonus either guarantees an additional berry or gives an equal chance of yielding 1-2 additional berries. Mulch can be applied to Stage 0 berry trees to mimic growth in the corresponding biome, granting the bonus yield while bypassing the need to plant the berries in their preferred biome. Below is a list of mulches and the biomes they are associated with. | |||
{| class="wikitable" | |||
!colspan="1" |Mulch | |||
!Biome | |||
|- | |||
|Loamy{{ScaledImage|Loamy Mulch.png|32px}} | |||
|Plains | |||
|- | |||
|Coarse{{ScaledImage|Coarse Mulch.png|32px}} | |||
|Mountains/Taiga | |||
|- | |||
|Peat{{ScaledImage|Peat Mulch.png|32px}} | |||
|Forest | |||
|- | |||
|Humid{{ScaledImage|Humid Mulch.png|32px}} | |||
|Jungle/Swamp | |||
|- | |||
|Sandy{{ScaledImage|Sandy Mulch.png|32px}} | |||
|Arid | |||
|} | |||
== Berry Mutating == | |||
{{InfoboxBlock|title=Placement for Mutating (3x3)|image=BerryTree Placement Correct.png|image2=BerryTree Placement Wrong.png}} | |||
Players can engage in more advanced berry farming by planting specific berry trees adjacent— but not diagonally— to each other for a chance to harvest mutated berries. Each harvest provides a 12.5% chance for a berry tree to yield mutated berries instead of normal ones. This chance can be increased through the use of Surprise Mulch. Below is a chart of all mutated berry combinations. | |||
{| class="wikitable" | {| class="wikitable" | ||
|+ | ! colspan="3" |Parent Berries | ||
! colspan="2" |Berry | ! | ||
! colspan="2" | | !Mutated Berry | ||
! colspan="2" | | !Preferred Mulch | ||
!Yield | |||
!Bonus Yield | |||
!Fully Mature | |||
!Replenish | |||
|- | |||
|Persim{{ScaledImage|Persim Berry.png|32px}} | |||
| + | |||
|Cheri {{ScaledImage|Cheri Berry.png|32px}} | |||
! rowspan="6" |→ | |||
|Figy {{ScaledImage|Figy Berry.png|24px}} | |||
|Loamy {{ScaledImage|Loamy Mulch.png|24px}} | |||
|2-3 | |||
|0-1 | |||
|60 Minutes | |||
|20 Minutes | |||
|- | |||
|Figy {{ScaledImage|Figy Berry.png|24px}} | |||
| + | |||
|Razz {{ScaledImage|Razz Berry.png|24px}} | |||
|Touga {{ScaledImage|Touga Berry.png|24px}} | |||
|Peat {{ScaledImage|Peat Mulch.png|24px}} | |||
|1-3 | |||
|0-1 | |||
|60 Minutes | |||
|20 Minutes | |||
|- | |||
| rowspan="2" |Touga {{ScaledImage|Touga Berry.png|24px}} | |||
| rowspan="2" | + | |||
|Colbur {{ScaledImage|Colbur Berry.png|24px}} | |||
|Spelon {{ScaledImage|Spelon Berry.png|24px}} | |||
|Sandy {{ScaledImage|Sandy Mulch.png|24px}} | |||
|1-2 | |||
|0-1 | |||
|80 Minutes | |||
|20 Minutes | |||
|- | |||
|Occa {{ScaledImage|Occa Berry.png|24px}} | |||
|Tamato {{ScaledImage|Tamato Berry.png|24px}} | |||
|Loamy {{ScaledImage|Loamy Mulch.png|24px}} | |||
|1-2 | |||
|0-1 | |||
|100 Minutes | |||
|25 Minutes | |||
|- | |||
| rowspan="2" |Spelon {{ScaledImage|Spelon Berry.png|24px}} | |||
| rowspan="2" | + | |||
|Chople {{ScaledImage|Chople Berry.png|24px}} | |||
|Lansat {{ScaledImage|Lansat Berry.png|24px}} | |||
|Coarse {{ScaledImage|Coarse Mulch.png|24px}} | |||
|1 | |||
|0-1 | |||
|80 Minutes | |||
|23 Minutes | |||
|- | |||
|Tamato {{ScaledImage|Tamato Berry.png|24px}} | |||
|Salac {{ScaledImage|Salac Berry.png|24px}} | |||
|Sandy {{ScaledImage|Sandy Mulch.png|24px}} | |||
|1 | |||
|0-1 | |||
|80 Minutes | |||
|23 Minutes | |||
|- | |||
! colspan="10" | | |||
|- | |||
|Persim{{ScaledImage|Persim Berry.png|32px}} | |||
| + | |||
|Chesto{{ScaledImage|Chesto Berry.png|32px}} | |||
! rowspan="6" |→ | |||
|Wiki {{ScaledImage|Wiki Berry.png|24px}} | |||
|Sandy {{ScaledImage|Sandy Mulch.png|24px}} | |||
|2-3 | |||
|0-1 | |||
|60 min | |||
|20 min | |||
|- | |||
|Wiki {{ScaledImage|Wiki Berry.png|24px}} | |||
| + | |||
|Bluk {{ScaledImage|Bluk Berry.png|24px}} | |||
|Cornn {{ScaledImage|Cornn Berry.png|24px}} | |||
|Loamy {{ScaledImage|Loamy Mulch.png|24px}} | |||
|1-3 | |||
|0-1 | |||
|60 min | |||
|20 min | |||
|- | |||
| rowspan="2" |Cornn {{ScaledImage|Cornn Berry.png|24px}} | |||
| rowspan="2" | + | |||
|Passho {{ScaledImage|Passho Berry.png|24px}} | |||
|Pamtre {{ScaledImage|Pamtre Berry.png|24px}} | |||
|Humid {{ScaledImage|Humid Mulch.png|24px}} | |||
|1-2 | |||
|0-1 | |||
|80 min | |||
|20 min | |||
|- | |||
|Rindo {{ScaledImage|Rindo Berry.png|24px}} | |||
|Kelpsy {{ScaledImage|Kelpsy Berry.png|24px}} | |||
|Coarse {{ScaledImage|Coarse Mulch.png|24px}} | |||
|1-2 | |||
|0-1 | |||
|100 min | |||
|25 min | |||
|- | |||
| rowspan="2" |Pamtre {{ScaledImage|Pamtre Berry.png|24px}} | |||
| rowspan="2" | + | |||
|Kebia {{ScaledImage|Kebia Berry.png|24px}} | |||
|Micle {{ScaledImage|Micle Berry.png|24px}} | |||
|Loamy {{ScaledImage|Loamy Mulch.png|24px}} | |||
|1 | |||
|0-1 | |||
|80 min | |||
|20 min | |||
|- | |||
|Kelpsy {{ScaledImage|Kelpsy Berry.png|24px}} | |||
|Liechi {{ScaledImage|Liechi Berry.png|24px}} | |||
|Humid {{ScaledImage|Humid Mulch.png|24px}} | |||
|1 | |||
|0-1 | |||
|80 min | |||
|23 min | |||
|- | |||
! colspan="10" | | |||
|- | |||
|Persim{{ScaledImage|Persim Berry.png|32px}} | |||
| + | |||
|Pecha{{ScaledImage|Pecha Berry.png|32px}} | |||
! rowspan="6" |→ | |||
|Mago {{ScaledImage|Mago Berry.png|24px}} | |||
|Peat {{ScaledImage|Peat Mulch.png|24px}} | |||
|2-3 | |||
|0-1 | |||
|60 min | |||
|20 min | |||
|- | |||
|Mago {{ScaledImage|Mago Berry.png|24px}} | |||
| + | |||
|Nanab {{ScaledImage|Nanab Berry.png|24px}} | |||
|Magost {{ScaledImage|Magost Berry.png|24px}} | |||
|Humid {{ScaledImage|Humid Mulch.png|24px}} | |||
|1-3 | |||
|0-1 | |||
|60 min | |||
|20 min | |||
|- | |||
| rowspan="2" |Magost {{ScaledImage|Magost Berry.png|24px}} | |||
| rowspan="2" | + | |||
|Tanga {{ScaledImage|Tanga Berry.png|24px}} | |||
|Watmel {{ScaledImage|Watmel Berry.png|24px}} | |||
|Humid {{ScaledImage|Humid Mulch.png|24px}} | |||
|1-2 | |||
|0-1 | |||
|80 min | |||
|20 min | |||
|- | |||
|Roseli{{ScaledImage|Roseli Berry.png|24px}} | |||
|Qualot {{ScaledImage|Qualot Berry.png|24px}} | |||
|Humid {{ScaledImage|Humid Mulch.png|24px}} | |||
|1-2 | |||
|0-1 | |||
|100 min | |||
|25 min | |||
|- | |||
| rowspan="2" |Watmel {{ScaledImage|Watmel Berry.png|24px}} | |||
| rowspan="2" | + | |||
|Chilan {{ScaledImage|Chilan Berry.png|24px}} | |||
|Custap {{ScaledImage|Custap Berry.png|24px}} | |||
|Peat {{ScaledImage|Peat Mulch.png|24px}} | |||
|1 | |||
|0-1 | |||
|80 min | |||
|20 min | |||
|- | |||
|Qualot {{ScaledImage|Qualot Berry.png|24px}} | |||
|Ganlon {{ScaledImage|Ganlon Berry.png|24px}} | |||
|Loamy {{ScaledImage|Loamy Mulch.png|24px}} | |||
|1 | |||
|0-1 | |||
|80 min | |||
|23 min | |||
|- | |||
! colspan="10" | | |||
|- | |||
|Persim{{ScaledImage|Persim Berry.png|32px}} | |||
| + | |||
|Rawst{{ScaledImage|Rawst Berry.png|32px}} | |||
! rowspan="6" |→ | |||
|Aguav{{ScaledImage|Aguav Berry.png|24px}} | |||
|Humid {{ScaledImage|Humid Mulch.png|24px}} | |||
|2-3 | |||
|0-1 | |||
|60 min | |||
|20 min | |||
|- | |||
|Aguav{{ScaledImage|Aguav Berry.png|24px}} | |||
| + | |||
|Wepear {{ScaledImage|Wepear Berry.png|24px}} | |||
|Rabuta {{ScaledImage|Rabuta Berry.png|24px}} | |||
|Sandy {{ScaledImage|Sandy Mulch.png|24px}} | |||
|1-3 | |||
|0-1 | |||
|60 min | |||
|20 min | |||
|- | |||
| rowspan="2" |Rabuta {{ScaledImage|Rabuta Berry.png|24px}} | |||
| rowspan="2" | + | |||
|Babiri {{ScaledImage|Babiri Berry.png|24px}} | |||
|Durin {{ScaledImage|Durin Berry.png|24px}} | |||
|Peat {{ScaledImage|Peat Mulch.png|24px}} | |||
|1-2 | |||
|0-1 | |||
|80 min | |||
|20 min | |||
|- | |||
|Shuca {{ScaledImage|Shuca Berry.png|24px}} | |||
|Hondew {{ScaledImage|Hondew Berry.png|24px}} | |||
|Sandy {{ScaledImage|Sandy Mulch.png|24px}} | |||
|1-2 | |||
|0-1 | |||
|100 min | |||
|25 min | |||
|- | |||
| rowspan="2" |Durin {{ScaledImage|Durin Berry.png|24px}} | |||
| rowspan="2" | + | |||
|Charti {{ScaledImage|Charti Berry.png|24px}} | |||
|Jaboca {{ScaledImage|Jaboca Berry.png|24px}} | |||
|Loamy {{ScaledImage|Loamy Mulch.png|24px}} | |||
|1 | |||
|0-1 | |||
|80 min | |||
|20 min | |||
|- | |||
|Hondew {{ScaledImage|Hondew Berry.png|24px}} | |||
|Petaya {{ScaledImage|Petaya Berry.png|24px}} | |||
|Sandy {{ScaledImage|Sandy Mulch.png|24px}} | |||
|1 | |||
|0-1 | |||
|80 min | |||
|23 min | |||
|- | |||
! colspan="10" | | |||
|- | |||
|Persim{{ScaledImage|Persim Berry.png|32px}} | |||
| + | |||
|Aspear{{ScaledImage|Aspear Berry.png|32px}} | |||
! rowspan="6" |→ | |||
|Iapapa {{ScaledImage|Iapapa Berry.png|24px}} | |||
|Sandy {{ScaledImage|Sandy Mulch.png|24px}} | |||
|2-3 | |||
|0-1 | |||
|60 min | |||
|20 min | |||
|- | |||
|Iapapa {{ScaledImage|Iapapa Berry.png|24px}} | |||
| + | |||
|Pinap {{ScaledImage|Pinap Berry.png|24px}} | |||
|Nomel {{ScaledImage|Nomel Berry.png|24px}} | |||
|Coarse {{ScaledImage|Coarse Mulch.png|24px}} | |||
|1-3 | |||
|0-1 | |||
|60 min | |||
|20 min | |||
|- | |||
| rowspan="2" |Nomel {{ScaledImage|Nomel Berry.png|24px}} | |||
| rowspan="2" | + | |||
|Payapa {{ScaledImage|Payapa Berry.png|24px}} | |||
|Belue {{ScaledImage|Belue Berry.png|24px}} | |||
|Coarse {{ScaledImage|Coarse Mulch.png|24px}} | |||
|1-2 | |||
|0-1 | |||
|80 min | |||
|20 min | |||
|- | |||
|Yache {{ScaledImage|Yache Berry.png|24px}} | |||
|Grepa {{ScaledImage|Grepa Berry.png|24px}} | |||
|Peat {{ScaledImage|Peat Mulch.png|24px}} | |||
|1-2 | |||
|0-1 | |||
|100 min | |||
|25 min | |||
|- | |||
| rowspan="2" |Belue {{ScaledImage|Belue Berry.png|24px}} | |||
| rowspan="2" | + | |||
|Coba {{ScaledImage|Coba Berry.png|24px}} | |||
|Rowap {{ScaledImage|Rowap Berry.png|24px}} | |||
|Coarse {{ScaledImage|Coarse Mulch.png|24px}} | |||
|1 | |||
|0-1 | |||
|80 min | |||
|20 min | |||
|- | |||
|Grepa {{ScaledImage|Grepa Berry.png|24px}} | |||
|Apicot {{ScaledImage|Apicot Berry.png|24px}} | |||
|Coarse {{ScaledImage|Coarse Mulch.png|24px}} | |||
|1 | |||
|0-1 | |||
|80 min | |||
|23 min | |||
|- | |||
! colspan="10" | | |||
|- | |||
| rowspan="6" |Oran {{ScaledImage|Oran Berry.png|32px}} | |||
| rowspan="6" | + | |||
|One of the following: | |||
! rowspan="6" |→ | |||
| rowspan="6" |Lum {{ScaledImage|Lum Berry.png|24px}} | |||
| rowspan="6" |Humid {{ScaledImage|Humid Mulch.png|24px}} | |||
| rowspan="6" |1-2 | |||
| rowspan="6"|0-1 | |||
| rowspan="6" |80 min | |||
| rowspan="6" |22 min | |||
|- | |||
|Cheri {{ScaledImage|Cheri Berry.png|32px}} | |||
|- | |||
|Chesto {{ScaledImage|Chesto Berry.png|32px}} | |||
|- | |||
|Pecha {{ScaledImage|Pecha Berry.png|32px}} | |||
|- | |||
|Rawst {{ScaledImage|Rawst Berry.png|32px}} | |||
|- | |||
|Aspear {{ScaledImage|Aspear Berry.png|32px}} | |||
|- | |||
! colspan="10" | | |||
|- | |||
| rowspan="6" |Oran {{ScaledImage|Oran Berry.png|32px}} | |||
| rowspan="6" | + | |||
|One of the following: | |||
! rowspan="6" |→ | |||
| rowspan="6" |Leppa {{ScaledImage|Leppa Berry.png|24px}} | |||
| rowspan="6" |Loamy {{ScaledImage|Loamy Mulch.png|24px}} | |||
| rowspan="6" |1-2 | |||
| rowspan="6" |0-1 | |||
| rowspan="6" |80 min | |||
| rowspan="6" |22 min | |||
|- | |||
|Razz {{ScaledImage|Razz Berry.png|32px}} | |||
|- | |||
|Bluk {{ScaledImage|Bluk Berry.png|32px}} | |||
|- | |||
|Nanab {{ScaledImage|Nanab Berry.png|32px}} | |||
|- | |||
|Wepear {{ScaledImage|Wepear Berry.png|32px}} | |||
|- | |||
|Pinap {{ScaledImage|Pinap Berry.png|32px}} | |||
|- | |||
! colspan="10" | | |||
|- | |||
| rowspan="6" |Lum {{ScaledImage|Lum Berry.png|24px}} | |||
| rowspan="6" | + | |||
|One of the following: | |||
! rowspan="6" |→ | |||
| rowspan="6" |Sitrus {{ScaledImage|Sitrus Berry.png|24px}} | |||
| rowspan="6" |Coarse {{ScaledImage|Coarse Mulch.png|24px}} | |||
| rowspan="6" |1-3 | |||
| rowspan="6" |0-1 | |||
| rowspan="6" |80 min | |||
| rowspan="6" |22 min | |||
|- | |||
|Figy {{ScaledImage|Figy Berry.png|24px}} | |||
|- | |||
|Wiki {{ScaledImage|Wiki Berry.png|24px}} | |||
|- | |||
|Mago {{ScaledImage|Mago Berry.png|24px}} | |||
|- | |||
|Aguav{{ScaledImage|Aguav Berry.png|24px}} | |||
|- | |||
|Iapapa {{ScaledImage|Iapapa Berry.png|24px}} | |||
|- | |||
! colspan="10" | | |||
|- | |||
|Lum {{ScaledImage|Lum Berry.png|24px}} | |||
| + | |||
|Leppa {{ScaledImage|Leppa Berry.png|24px}} | |||
!→ | |||
|Hopo {{ScaledImage|Hopo Berry.png|24px}} | |||
|Coarse {{ScaledImage|Coarse Mulch.png|24px}} | |||
|1-2 | |||
|0-1 | |||
|120 min | |||
|25 min | |||
|- | |||
! colspan="10" | | |||
|- | |||
| rowspan="19" |Hopo {{ScaledImage|Hopo Berry.png|24px}} | |||
| rowspan="19" | + | |||
|One of the following: | |||
! rowspan="19" |→ | |||
| rowspan="19" |Enigma {{ScaledImage|Enigma Berry.png|24px}} | |||
| rowspan="19" |Peat {{ScaledImage|Peat Mulch.png|24px}} | |||
| rowspan="19" |1 | |||
| rowspan="19" |0-1 | |||
| rowspan="19" |80 min | |||
| rowspan="19" |20 min | |||
|- | |||
|Occa {{ScaledImage|Occa Berry.png|32px}} | |||
|- | |||
|Passho {{ScaledImage|Passho Berry.png|32px}} | |||
|- | |||
|Wacan {{ScaledImage|Wacan Berry.png|32px}} | |||
|- | |||
|Rindo {{ScaledImage|Rindo Berry.png|32px}} | |||
|- | |||
|Yache {{ScaledImage|Yache Berry.png|32px}} | |||
|- | |||
|Chople {{ScaledImage|Chople Berry.png|32px}} | |||
|- | |||
|Kebia {{ScaledImage|Kebia Berry.png|32px}} | |||
|- | |||
|Shuca {{ScaledImage|Shuca Berry.png|32px}} | |||
|- | |||
|Coba {{ScaledImage|Coba Berry.png|32px}} | |||
|- | |||
|Payapa {{ScaledImage|Payapa Berry.png|32px}} | |||
|- | |||
|Tanga {{ScaledImage|Tanga Berry.png|32px}} | |||
|- | |||
|Charti {{ScaledImage|Charti Berry.png|32px}} | |||
|- | |||
|Kasib {{ScaledImage|Kasib Berry.png|32px}} | |||
|- | |||
|Haban {{ScaledImage|Haban Berry.png|32px}} | |||
|- | |||
|Colbur {{ScaledImage|Colbur Berry.png|32px}} | |||
|- | |||
|Babiri {{ScaledImage|Babiri Berry.png|32px}} | |||
|- | |||
|Chilan {{ScaledImage|Chilan Berry.png|32px}} | |||
|- | |||
|Roseli {{ScaledImage|Roseli Berry.png|32px}} | |||
|- | |||
! colspan="10" | | |||
|- | |||
| rowspan="2" |Enigma {{ScaledImage|Enigma Berry.png|24px}} | |||
| rowspan="2" | + | |||
|Wacan {{ScaledImage|Wacan Berry.png|32px}} | |||
! rowspan="2" |→ | |||
|Maranga {{ScaledImage|Maranga Berry.png|24px}} | |||
|Humid {{ScaledImage|Humid Mulch.png|24px}} | |||
|1-2 | |||
|0-1 | |||
|80 min | |||
|20 min | |||
|- | |||
|Kasib {{ScaledImage|Kasib Berry.png|32px}} | |||
|Kee {{ScaledImage|Kee Berry.png|24px}} | |||
|Peat {{ScaledImage|Peat Mulch.png|24px}} | |||
|1-2 | |||
|0-1 | |||
|80 min | |||
|20 min | |||
|- | |||
! colspan="10" | | |||
|- | |||
|Sitrus {{ScaledImage|Sitrus Berry.png|24px}} | |||
| + | |||
|Haban {{ScaledImage|Haban Berry.png|24px}} | |||
!→ | |||
|Pomeg {{ScaledImage|Pomeg Berry.png|24px}} | |||
|Peat {{ScaledImage|Peat Mulch.png|24px}} | |||
|1-2 | |||
|0-1 | |||
|100 min | |||
|25 min | |||
|- | |||
! colspan="10" | | |||
|- | |||
| rowspan="6" |Pomeg {{ScaledImage|Pomeg Berry.png|24px}} | |||
| rowspan="6" | + | |||
|One of the following: | |||
! rowspan="6" |→ | |||
| rowspan="6" |Starf {{ScaledImage|Starf Berry.png|24px}} | |||
| rowspan="6" |Loamy {{ScaledImage|Loamy Mulch.png|24px}} | |||
| rowspan="6" |1 | |||
| rowspan="6" |0-1 | |||
| rowspan="6" |80 min | |||
| rowspan="6" |21.5 min | |||
|- | |||
|Tamato {{ScaledImage|Tamato Berry.png|24px}} | |||
|- | |- | ||
| | |Kelpsy {{ScaledImage|Kelpsy Berry.png|24px}} | ||
|- | |- | ||
| | |Qualot {{ScaledImage|Qualot Berry.png|24px}} | ||
|- | |- | ||
| | |Hondew {{ScaledImage|Hondew Berry.png|24px}} | ||
|- | |- | ||
| | |Grepa {{ScaledImage|Grepa Berry.png|24px}} | ||
|- | |- | ||
! colspan="10" | | |||
|- | |- | ||
| | | rowspan="6" |Leppa {{ScaledImage|Leppa Berry.png|24px}} | ||
| | | rowspan="6" | + | ||
| | |One of the following: | ||
| | ! rowspan="6" |→ | ||
| | | rowspan="6" |Eggant {{ScaledImage|Eggant Berry.png|24px}} | ||
| rowspan="6" |Humid {{ScaledImage|Humid Mulch.png|24px}} | |||
| rowspan="6" |1-3 | |||
| rowspan="6" |0-1 | |||
| rowspan="6" |60 min | |||
| rowspan="6" |20 min | |||
|- | |- | ||
| | |Figy {{ScaledImage|Figy Berry.png|32px}} | ||
|- | |- | ||
| | |Wiki {{ScaledImage|Wiki Berry.png|32px}} | ||
|- | |- | ||
| | |Mago {{ScaledImage|Mago Berry.png|32px}} | ||
|- | |- | ||
| | |Aguav {{ScaledImage|Aguav Berry.png|32px}} | ||
|- | |- | ||
| | |Iapapa {{ScaledImage|Iapapa Berry.png|32px}} | ||
|- | |- | ||
|} | |} | ||
== | ==Natural Berry Tree Locations and Preferred Mulch== | ||
{| class="wikitable" | {| class="wikitable" | ||
! | |+ | ||
!Berry | |||
! colspan="5" |Biome spawn tag(s) | ! colspan="5" |Biome spawn tag(s) | ||
! colspan="2" | | !Preferred Mulch | ||
!Yield | |||
!Bonus Yield | |||
|- | |||
|Oran {{ScaledImage|Oran Berry.png|32px}} | |||
| colspan="5" |''All Biomes'' | |||
|Peat, Loamy | |||
|2-3 | |||
|0-1 | |||
|- | |||
|Cheri {{ScaledImage|Cheri Berry.png|32px}} | |||
| colspan="5" |''Plains'' | |||
|Loamy | |||
|2-3 | |||
|0-1 | |||
|- | |||
|Chesto {{ScaledImage|Chesto Berry.png|32px}} | |||
| colspan="5" |''Forest'' | |||
| Peat | |||
|2-3 | |||
|0-1 | |||
|- | |- | ||
| | |Pecha {{ScaledImage|Pecha Berry.png|32px}} | ||
| | | colspan="2" |''Jungle'' | ||
|'' | | colspan="3" |''Swamp'' | ||
| colspan=" | |Humid | ||
| | |2-3 | ||
| | |0-1 | ||
|- | |- | ||
| | |Rawst {{ScaledImage|Rawst Berry.png|32px}} | ||
| colspan="5" |''Arid'' | |||
|Sandy | |||
| colspan=" | |2-3 | ||
| | |0-1 | ||
| | |||
|- | |- | ||
| | |Aspear {{ScaledImage|Aspear Berry.png|32px}} | ||
|''' | | colspan="5" |''Mountain'' | ||
|Coarse | |||
|2-3 | |||
|0-1 | |||
|- | |||
|Persim {{ScaledImage|Persim Berry.png|32px}} | |||
| colspan="5" |''All Biomes'' | |||
|Sandy | |||
|2-3 | |||
|0-1 | |||
|- | |||
|Razz {{ScaledImage|Razz Berry.png|32px}} | |||
| colspan="5" |''Forest'' | |||
|Peat | |||
|2-3 | |||
|0-1 | |||
|- | |||
|Bluk {{ScaledImage|Bluk Berry.png|32px}} | |||
| colspan="2" |''Mountain'' | |||
| colspan="3" |''Taiga'' | |||
|Coarse | |||
|2-3 | |||
|0-1 | |||
|- | |||
|Nanab {{ScaledImage|Nanab Berry.png|32px}} | |||
| colspan="2" |''Jungle'' | |||
| colspan="3" |''Swamp'' | |||
|Humid | |||
|2-3 | |||
|0-1 | |||
|- | |||
|Wepear {{ScaledImage|Wepear Berry.png|32px}} | |||
| colspan="5" |''Plains'' | |||
|Loamy | |||
|2-3 | |||
|0-1 | |||
|- | |||
|Pinap {{ScaledImage|Pinap Berry.png|32px}} | |||
| colspan="5" |''Arid'' | |||
|Sandy | |||
|2-3 | |||
|0-1 | |||
|- | |||
|Occa {{ScaledImage|Occa Berry.png|32px}} | |||
|''Jungle'' | |||
|''Sandy'' | |||
|''Thermal'' | |||
| colspan="2" |''Volcanic'' | |||
|Humid, Sandy | |||
|1-3 | |||
|0-1 | |||
|- | |||
|Passho {{ScaledImage|Passho Berry.png|32px}} | |||
|''Coast'' | |||
|''Freshwater'' | |||
|''Island'' | |||
| colspan="2" |''Ocean'' | |||
|Humid, Sandy | |||
|1-3 | |||
|0-1 | |||
|- | |||
|Wacan {{ScaledImage|Wacan Berry.png|32px}} | |||
|''Grassland'' | |''Grassland'' | ||
|''Hills'' | |''Hills'' | ||
|''Sky'' | |''Sky'' | ||
| colspan="2" | | | colspan="2" | | ||
| | |Coarse, Loamy, Sandy | ||
| | |1-3 | ||
| 0-1 | |||
|- | |- | ||
| | |Rindo {{ScaledImage|Rindo Berry.png|32px}} | ||
| | |||
|''Jungle'' | |''Jungle'' | ||
|''Temperate'' | |''Temperate'' | ||
| colspan="3" |''Lush'' | | colspan="3" |''Lush'' | ||
| | |Humid, Loamy, Peat | ||
| | |1-3 | ||
|0-1 | |||
|- | |- | ||
| | |Yache {{ScaledImage|Yache Berry.png|32px}} | ||
| | |||
|''Freezing'' | |''Freezing'' | ||
| colspan="4" |''Taiga'' | | colspan="4" |''Taiga'' | ||
| | |Coarse | ||
| | |1-3 | ||
|0-1 | |||
|- | |- | ||
| | |Chople {{ScaledImage|Chople Berry.png|32px}} | ||
| | |||
|''Mountain'' | |''Mountain'' | ||
|''Bamboo'' | |''Bamboo'' | ||
| colspan="3" |''Taiga'' | | colspan="3" |''Taiga'' | ||
| | |Coarse | ||
| | |1-3 | ||
|0-1 | |||
|- | |- | ||
| | |Kebia {{ScaledImage|Kebia Berry.png|32px}} | ||
| | |||
|''Forest'' | |''Forest'' | ||
|''Mushroom'' | |''Mushroom'' | ||
|''Spooky'' | |''Spooky'' | ||
| colspan="2" |''Swamp'' | | colspan="2" |''Swamp'' | ||
| | |Humid, Peat | ||
| | |1-3 | ||
|0-1 | |||
|- | |- | ||
| | |Shuca {{ScaledImage|Shuca Berry.png|32px}} | ||
| | |||
|''Arid'' | |''Arid'' | ||
| colspan="4" |''Grassland'' | | colspan="4" |''Grassland'' | ||
| | |Loamy, Sandy | ||
| | |1-3 | ||
|0-1 | |||
|- | |- | ||
| | |Coba {{ScaledImage|Coba Berry.png|32px}} | ||
| | |||
|''Peak'' | |''Peak'' | ||
|''Temperate'' | |''Temperate'' | ||
| colspan="3" |''Sky'' | | colspan="3" |''Sky'' | ||
| | |Loamy, Peat | ||
| | |1-3 | ||
|0-1 | |||
|- | |- | ||
| | |Payapa {{ScaledImage|Payapa Berry.png|32px}} | ||
| | |||
|''Desert'' | |''Desert'' | ||
|''Floral'' | |''Floral'' | ||
| Line 163: | Line 798: | ||
|''Savanna'' | |''Savanna'' | ||
|''Spooky'' | |''Spooky'' | ||
| | | Loamy, Sandy | ||
| | |1-3 | ||
|0-1 | |||
|- | |- | ||
| | |Tanga {{ScaledImage|Tanga Berry.png|32px}} | ||
| | |||
|''Forest'' | |''Forest'' | ||
|''Jungle'' | |''Jungle'' | ||
| colspan="3" |''Swamp'' | | colspan="3" |''Swamp'' | ||
| | |Humid, Peat | ||
| | |1-3 | ||
|0-1 | |||
|- | |- | ||
| | | Charti {{ScaledImage|Charti Berry.png|32px}} | ||
| | |||
|''Dripstone'' | |''Dripstone'' | ||
|''Mountain'' | |''Mountain'' | ||
|''Sandy'' | |''Sandy'' | ||
| colspan="2" |''Volcanic'' | | colspan="2" |''Volcanic'' | ||
| | |Coarse, Sandy | ||
| | |1-3 | ||
|0-1 | |||
|- | |- | ||
| | |Kasib {{ScaledImage|Kasib Berry.png|32px}} | ||
| | |||
|''Dripstone'' | |''Dripstone'' | ||
|''Lush'' | |''Lush'' | ||
| Line 190: | Line 825: | ||
|''Swamp'' | |''Swamp'' | ||
|''Taiga'' | |''Taiga'' | ||
| | |Coarse, Humid | ||
| | |1-3 | ||
|0-1 | |||
|- | |- | ||
| | |Haban {{ScaledImage|Haban Berry.png|32px}} | ||
| | |||
|''Jungle'' | |''Jungle'' | ||
|''Magical'' | |''Magical'' | ||
| Line 200: | Line 835: | ||
|''Sky'' | |''Sky'' | ||
|''Volcanic'' | |''Volcanic'' | ||
| | | Coarse, Humid | ||
| | |1-3 | ||
|0-1 | |||
|- | |- | ||
| | |Colbur {{ScaledImage|Colbur Berry.png|32px}} | ||
| | |||
|''Badlands'' | |''Badlands'' | ||
|''Spooky'' | |''Spooky'' | ||
| colspan="3" |''Taiga'' | | colspan="3" |''Taiga'' | ||
| | |Coarse, Sandy | ||
| | |1-3 | ||
|0-1 | |||
|- | |- | ||
| | |Babiri {{ScaledImage|Babiri Berry.png|32px}} | ||
| | |||
|''Bamboo'' | |''Bamboo'' | ||
|''Mountain'' | |''Mountain'' | ||
| colspan="3" |''Taiga'' | | colspan="3" |''Taiga'' | ||
| | |Coarse | ||
| | |1-3 | ||
| 0-1 | |||
|- | |- | ||
| | | Chilan {{ScaledImage|Chilan Berry.png|32px}} | ||
| | |||
|''Temperate'' | |''Temperate'' | ||
| colspan="4" |''Grassland'' | | colspan="4" |''Grassland'' | ||
| | |Loamy, Peat | ||
| | |1-3 | ||
|0-1 | |||
|- | |- | ||
| | |Roseli {{ScaledImage|Roseli Berry.png|32px}} | ||
| | | colspan="2" |''Floral'' | ||
|''Floral'' | |||
|''Island'' | |''Island'' | ||
|''Magical'' | |''Magical'' | ||
|''Mushroom'' | |||
| | |Loamy, Peat | ||
| | |1-3 | ||
|0-1 | |||
|} | |} | ||
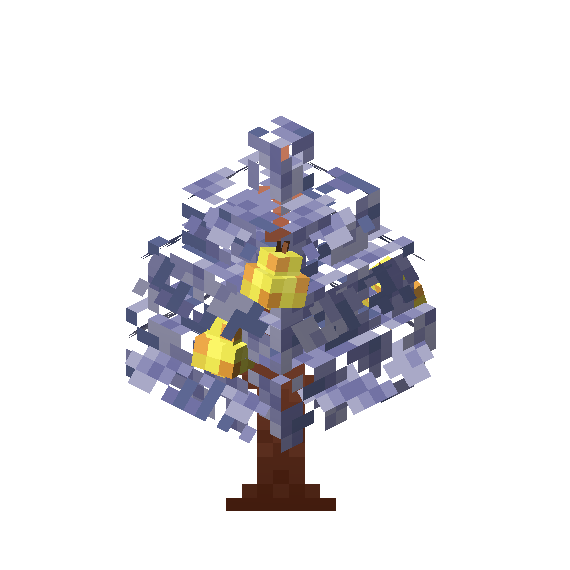
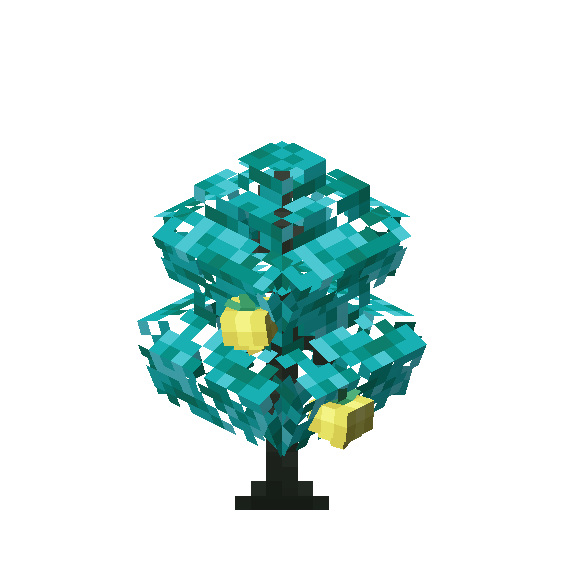
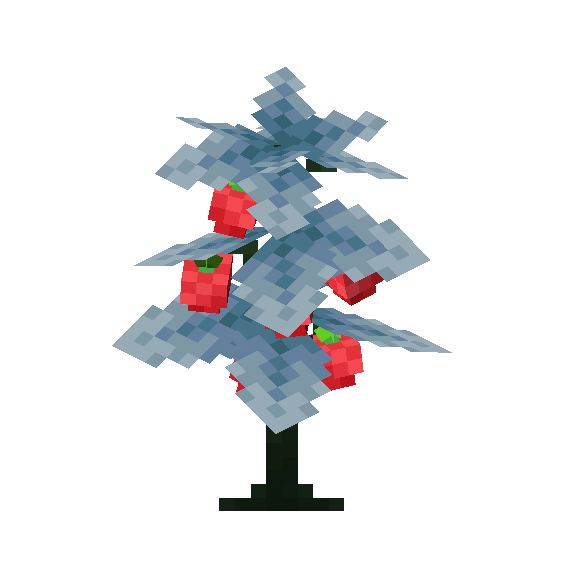
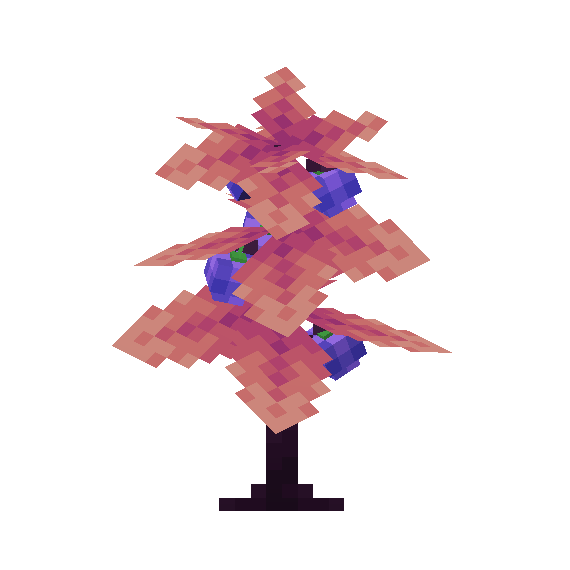
== Berry | ==Gallery== | ||
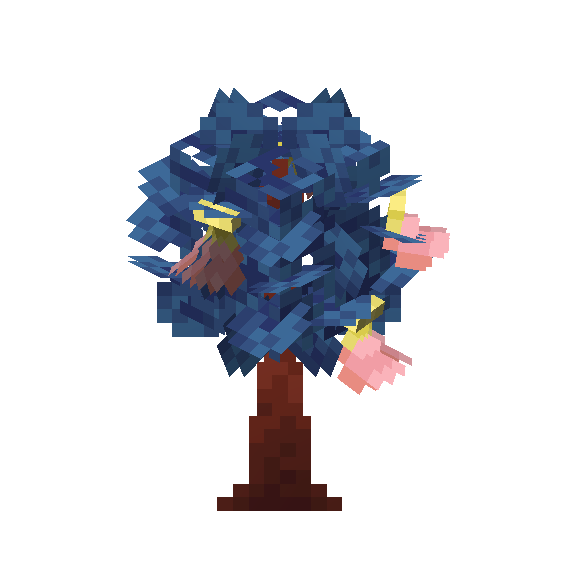
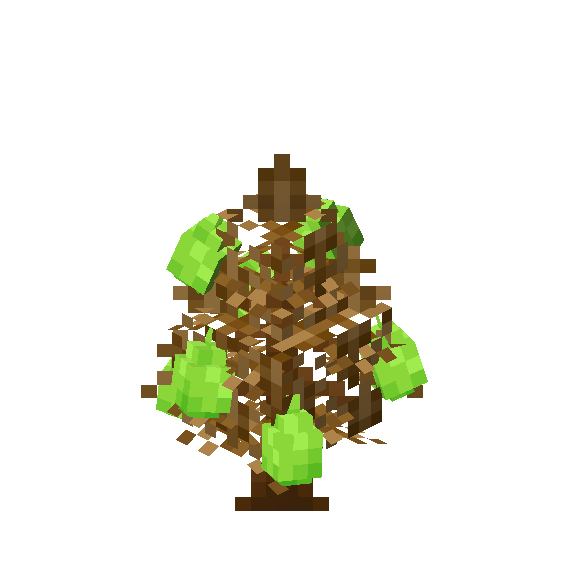
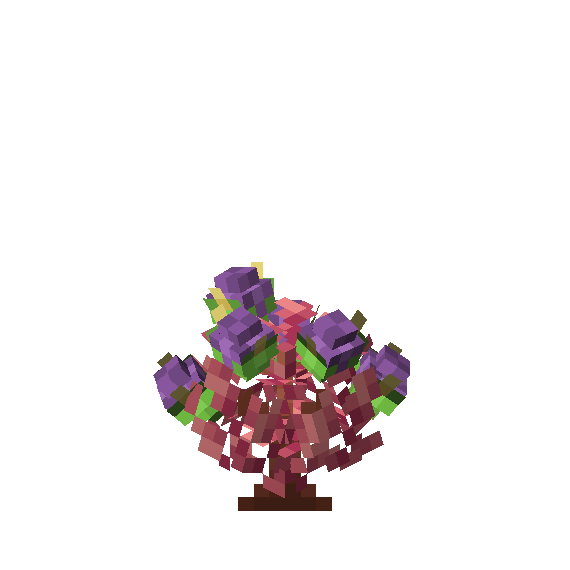
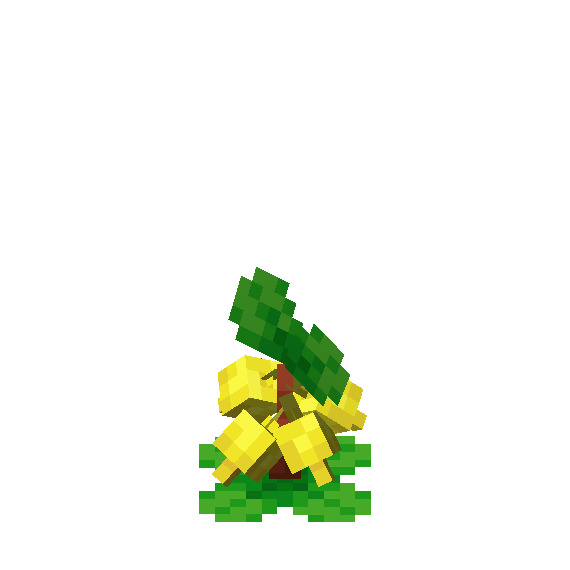
<gallery> | |||
Oran Berry (block, stage 4).png|An Oran Berry tree. | |||
| | Cheri Berry (block, stage 4).png|A Cheri Berry tree. | ||
Chesto Berry (block, stage 4).png|A Chesto Berry tree. | |||
Pecha Berry (block, stage 4).png|A Pecha Berry tree. | |||
Rawst Berry (block, stage 4).png|A Rawst Berry tree. | |||
Aspear Berry (block, stage 4).png|An Aspear Berry tree. | |||
Persim Berry (block, stage 4).png|A Persim Berry tree. | |||
| | Leppa Berry (block, stage 4).png|A Leppa Berry tree. | ||
| | Lum Berry (block, stage 4).png|A Lum Berry tree. | ||
| | Figy Berry (block, stage 4).png|A Figy Berry tree. | ||
| | Wiki Berry (block, stage 4).png|A Wiki Berry tree. | ||
| | Mago Berry (block, stage 4).png|A Mago Berry tree. | ||
| | Aguav Berry (block, stage 4).png|An Aguav Berry tree. | ||
| | Iapapa Berry (block, stage 4).png|An Iapapa Berry tree. | ||
| | Sitrus Berry (block, stage 4).png|A Sitrus Berry tree. | ||
| | Touga Berry (block, stage 4).png|A Touga Berry tree. | ||
| | Hopo Berry (block, stage 4).png|A Hopo Berry tree. | ||
| | Razz Berry (block, stage 4).png|A Razz Berry tree. | ||
| | Bluk Berry (block, stage 4).png|A Bluk Berry tree. | ||
| | Nanab Berry (block, stage 4).png|A Nanab Berry tree. | ||
| | Wepear Berry (block, stage 4).png|A Wepear Berry tree. | ||
| | Pinap Berry (block, stage 4).png|A Pinap Berry tree. | ||
| | Cornn Berry (block, stage 4).png|A Cornn Berry tree. | ||
| | Magost Berry (block, stage 4).png|A Magost Berry tree. | ||
| | Rabuta Berry (block, stage 4).png|A Rabuta Berry tree. | ||
| | Nomel Berry (block, stage 4).png|A Nomel Berry tree. | ||
| | Spelon Berry (block, stage 4).png|A Spelon Berry tree. | ||
| | Pamtre Berry (block, stage 4).png|A Pamtre Berry tree. | ||
| | Watmel Berry (block, stage 4).png|A Watmel Berry tree. | ||
| | Durin Berry (block, stage 4).png|A Durin Berry tree. | ||
| | Belue Berry (block, stage 4).png|A Belue Berry tree. | ||
| | Chilan Berry (block, stage 4).png|A Chilan Berry tree. | ||
|} | Chople Berry (block, stage 4).png|A Chople Berry tree. | ||
Coba Berry (block, stage 4).png|A Coba Berry tree. | |||
Kebia Berry (block, stage 4).png|A Kebia Berry tree. | |||
Shuca Berry (block, stage 4).png|A Shuca Berry tree. | |||
Charti Berry (block, stage 4).png|A Charti Berry tree. | |||
Tanga Berry (block, stage 4).png|A Tanga Berry tree. | |||
Kasib Berry (block, stage 4).png|A Kasib Berry tree. | |||
Babiri Berry (block, stage 4).png|A Babiri Berry tree. | |||
Occa Berry (block, stage 4).png|An Occa Berry tree. | |||
Passho Berry (block, stage 4).png|A Passho Berry tree. | |||
Rindo Berry (block, stage 4).png|A Rindo Berry tree. | |||
Wacan Berry (block, stage 4).png|A Wacan Berry tree. | |||
Payapa Berry (block, stage 4).png|A Payapa Berry tree. | |||
Yache Berry (block, stage 4).png|A Yache Berry tree. | |||
Haban Berry (block, stage 4).png|A Haban Berry tree. | |||
Colbur Berry (block, stage 4).png|A Colbur Berry tree. | |||
Roseli Berry (block, stage 4).png|A Roseli Berry tree. | |||
Pomeg Berry (block, stage 4).png|A Pomeg Berry tree. | |||
Kelpsy Berry (block, stage 4).png|A Kelpsy Berry tree. | |||
Qualot Berry (block, stage 4).png|A Qualot Berry tree. | |||
Hondew Berry (block, stage 4).png|A Hondew Berry tree. | |||
Grepa Berry (block, stage 4).png|A Grepa Berry tree. | |||
Tamato Berry (block, stage 4).png|A Tamato Berry tree. | |||
Enigma Berry (block, stage 4).png|A Enigma Berry tree. | |||
Kee Berry (block, stage 4).png|A Kee Berry tree. | |||
Maranga Berry (block, stage 4).png|A Maranga Berry tree. | |||
Liechi Berry (block, stage 4).png|A Liechi Berry tree. | |||
Ganlon Berry (block, stage 4).png|A Ganlon Berry tree. | |||
Salac Berry (block, stage 4).png|A Salac Berry tree. | |||
Petaya Berry (block, stage 4).png|A Petaya Berry tree. | |||
Apicot Berry (block, stage 4).png|A Apicot Berry tree. | |||
Lansat Berry (block, stage 4).png|A Lansat Berry tree. | |||
Starf Berry (block, stage 4).png|A Starf Berry tree. | |||
Micle Berry (block, stage 4).png|A Micle Berry tree. | |||
Custap Berry (block, stage 4).png|A Custap Berry tree. | |||
Jaboca Berry (block, stage 4).png|A Jaboca Berry tree. | |||
Rowap Berry (block, stage 4).png|A Rowap Berry tree. | |||
Eggant Berry (block, stage 4).png|An Eggant Berry tree. | |||
</gallery>{{Blocks}} | |||
[[Category:Plants]] | |||
[[Category:Blocks]] | |||
Latest revision as of 22:00, 9 June 2026
.png)
.png)
.png)
.png)
.png)
.png)
.png)
.png)
.png)
.png)
.png)
.png)
.png)
.png)
.png)
.png)
.png)
.png)
.png)
.png)
.png)
.png)
.png)
.png)
.png)
.png)
.png)
.png)
.png)
.png)
.png)
.png)
.png)
.png)
.png)
.png)
.png)
.png)
.png)
.png)
.png)
.png)
.png)
.png)
.png)
.png)
.png)
.png)
.png)
.png)
.png)
.png)
.png)
.png)
.png)
.png)
.png)
.png)
.png)
.png)
.png)
.png)
.png)
.png)
.png)
.png)
.png)
.png)
.png)
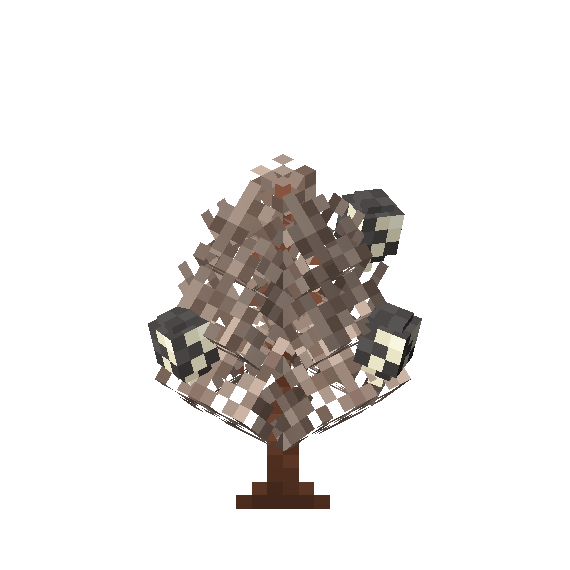
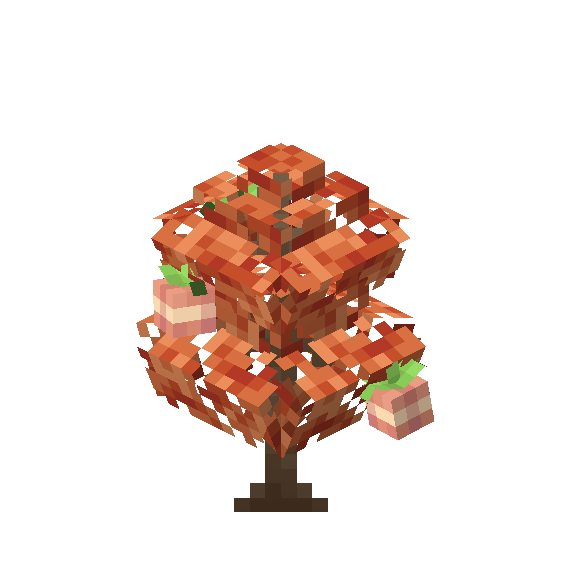
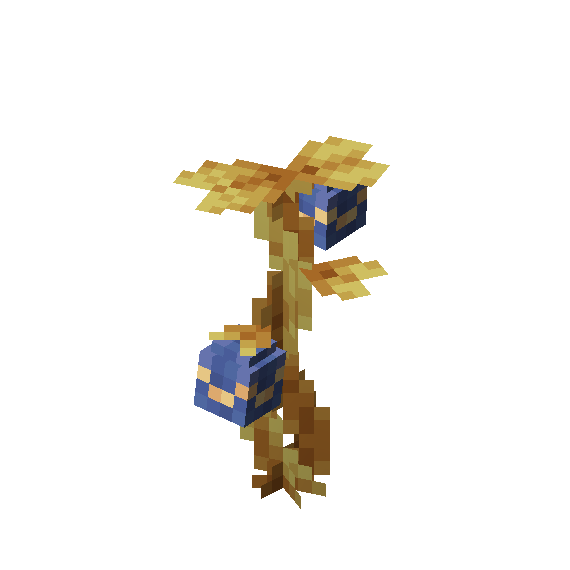
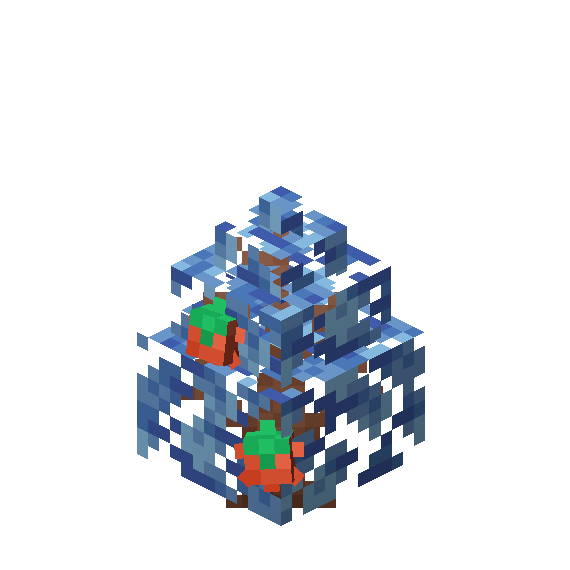
Berry Trees are a type of plant that yields the player berries when harvested. On occasion, a berry farm will spawn in place of a normal vanilla village farm. There are currently 30 unique berries that spawn naturally, and 39 obtained through berry mutations.
Berry Farming
Berries can be planted on any Farmland blocks. After being placed, they go through four stages of growth, with the final stage producing flowers on the plant that eventually turn into berries. Interacting with a fruiting berry tree will yield a varying amount of berries, which will replenish naturally over time. Berry trees can also be harvested by powering a redstone dispenser containing shears.
Berry yields can be increased by either planting berries in their preferred biomes, or using the berry's preferred mulch on the soil after planting it.
Advancements
| Cobblemon 1.4.1 | ||
|---|---|---|
| An Unexpected Result | Goal | "Plant Berry Trees of different types next to each other and witness Mutation in action." |
Preferred Soil
Each type of berry tree yields more berries when grown in the soil of its preferred biome. Depending on the berry tree, this bonus either guarantees an additional berry or gives an equal chance of yielding 1-2 additional berries. Mulch can be applied to Stage 0 berry trees to mimic growth in the corresponding biome, granting the bonus yield while bypassing the need to plant the berries in their preferred biome. Below is a list of mulches and the biomes they are associated with.
| Mulch | Biome |
|---|---|
| Loamy |
Plains |
| Coarse |
Mountains/Taiga |
| Peat |
Forest |
| Humid |
Jungle/Swamp |
| Sandy |
Arid |
Berry Mutating


Players can engage in more advanced berry farming by planting specific berry trees adjacent— but not diagonally— to each other for a chance to harvest mutated berries. Each harvest provides a 12.5% chance for a berry tree to yield mutated berries instead of normal ones. This chance can be increased through the use of Surprise Mulch. Below is a chart of all mutated berry combinations.
| Parent Berries | Mutated Berry | Preferred Mulch | Yield | Bonus Yield | Fully Mature | Replenish | |||
|---|---|---|---|---|---|---|---|---|---|
| Persim |
+ | Cheri |
→ | Figy |
Loamy |
2-3 | 0-1 | 60 Minutes | 20 Minutes |
| Figy |
+ | Razz |
Touga |
Peat |
1-3 | 0-1 | 60 Minutes | 20 Minutes | |
| Touga |
+ | Colbur |
Spelon |
Sandy |
1-2 | 0-1 | 80 Minutes | 20 Minutes | |
| Occa |
Tamato |
Loamy |
1-2 | 0-1 | 100 Minutes | 25 Minutes | |||
| Spelon |
+ | Chople |
Lansat |
Coarse |
1 | 0-1 | 80 Minutes | 23 Minutes | |
| Tamato |
Salac |
Sandy |
1 | 0-1 | 80 Minutes | 23 Minutes | |||
| Persim |
+ | Chesto |
→ | Wiki |
Sandy |
2-3 | 0-1 | 60 min | 20 min |
| Wiki |
+ | Bluk |
Cornn |
Loamy |
1-3 | 0-1 | 60 min | 20 min | |
| Cornn |
+ | Passho |
Pamtre |
Humid |
1-2 | 0-1 | 80 min | 20 min | |
| Rindo |
Kelpsy |
Coarse |
1-2 | 0-1 | 100 min | 25 min | |||
| Pamtre |
+ | Kebia |
Micle |
Loamy |
1 | 0-1 | 80 min | 20 min | |
| Kelpsy |
Liechi |
Humid |
1 | 0-1 | 80 min | 23 min | |||
| Persim |
+ | Pecha |
→ | Mago |
Peat |
2-3 | 0-1 | 60 min | 20 min |
| Mago |
+ | Nanab |
Magost |
Humid |
1-3 | 0-1 | 60 min | 20 min | |
| Magost |
+ | Tanga |
Watmel |
Humid |
1-2 | 0-1 | 80 min | 20 min | |
| Roseli |
Qualot |
Humid |
1-2 | 0-1 | 100 min | 25 min | |||
| Watmel |
+ | Chilan |
Custap |
Peat |
1 | 0-1 | 80 min | 20 min | |
| Qualot |
Ganlon |
Loamy |
1 | 0-1 | 80 min | 23 min | |||
| Persim |
+ | Rawst |
→ | Aguav |
Humid |
2-3 | 0-1 | 60 min | 20 min |
| Aguav |
+ | Wepear |
Rabuta |
Sandy |
1-3 | 0-1 | 60 min | 20 min | |
| Rabuta |
+ | Babiri |
Durin |
Peat |
1-2 | 0-1 | 80 min | 20 min | |
| Shuca |
Hondew |
Sandy |
1-2 | 0-1 | 100 min | 25 min | |||
| Durin |
+ | Charti |
Jaboca |
Loamy |
1 | 0-1 | 80 min | 20 min | |
| Hondew |
Petaya |
Sandy |
1 | 0-1 | 80 min | 23 min | |||
| Persim |
+ | Aspear |
→ | Iapapa |
Sandy |
2-3 | 0-1 | 60 min | 20 min |
| Iapapa |
+ | Pinap |
Nomel |
Coarse |
1-3 | 0-1 | 60 min | 20 min | |
| Nomel |
+ | Payapa |
Belue |
Coarse |
1-2 | 0-1 | 80 min | 20 min | |
| Yache |
Grepa |
Peat |
1-2 | 0-1 | 100 min | 25 min | |||
| Belue |
+ | Coba |
Rowap |
Coarse |
1 | 0-1 | 80 min | 20 min | |
| Grepa |
Apicot |
Coarse |
1 | 0-1 | 80 min | 23 min | |||
| Oran |
+ | One of the following: | → | Lum |
Humid |
1-2 | 0-1 | 80 min | 22 min |
| Cheri | |||||||||
| Chesto | |||||||||
| Pecha | |||||||||
| Rawst | |||||||||
| Aspear | |||||||||
| Oran |
+ | One of the following: | → | Leppa |
Loamy |
1-2 | 0-1 | 80 min | 22 min |
| Razz | |||||||||
| Bluk | |||||||||
| Nanab | |||||||||
| Wepear | |||||||||
| Pinap | |||||||||
| Lum |
+ | One of the following: | → | Sitrus |
Coarse |
1-3 | 0-1 | 80 min | 22 min |
| Figy | |||||||||
| Wiki | |||||||||
| Mago | |||||||||
| Aguav | |||||||||
| Iapapa | |||||||||
| Lum |
+ | Leppa |
→ | Hopo |
Coarse |
1-2 | 0-1 | 120 min | 25 min |
| Hopo |
+ | One of the following: | → | Enigma |
Peat |
1 | 0-1 | 80 min | 20 min |
| Occa | |||||||||
| Passho | |||||||||
| Wacan | |||||||||
| Rindo | |||||||||
| Yache | |||||||||
| Chople | |||||||||
| Kebia | |||||||||
| Shuca | |||||||||
| Coba | |||||||||
| Payapa | |||||||||
| Tanga | |||||||||
| Charti | |||||||||
| Kasib | |||||||||
| Haban | |||||||||
| Colbur | |||||||||
| Babiri | |||||||||
| Chilan | |||||||||
| Roseli | |||||||||
| Enigma |
+ | Wacan |
→ | Maranga |
Humid |
1-2 | 0-1 | 80 min | 20 min |
| Kasib |
Kee |
Peat |
1-2 | 0-1 | 80 min | 20 min | |||
| Sitrus |
+ | Haban |
→ | Pomeg |
Peat |
1-2 | 0-1 | 100 min | 25 min |
| Pomeg |
+ | One of the following: | → | Starf |
Loamy |
1 | 0-1 | 80 min | 21.5 min |
| Tamato | |||||||||
| Kelpsy | |||||||||
| Qualot | |||||||||
| Hondew | |||||||||
| Grepa | |||||||||
| Leppa |
+ | One of the following: | → | Eggant |
Humid |
1-3 | 0-1 | 60 min | 20 min |
| Figy | |||||||||
| Wiki | |||||||||
| Mago | |||||||||
| Aguav | |||||||||
| Iapapa | |||||||||
Natural Berry Tree Locations and Preferred Mulch
| Berry | Biome spawn tag(s) | Preferred Mulch | Yield | Bonus Yield | ||||
|---|---|---|---|---|---|---|---|---|
| Oran |
All Biomes | Peat, Loamy | 2-3 | 0-1 | ||||
| Cheri |
Plains | Loamy | 2-3 | 0-1 | ||||
| Chesto |
Forest | Peat | 2-3 | 0-1 | ||||
| Pecha |
Jungle | Swamp | Humid | 2-3 | 0-1 | |||
| Rawst |
Arid | Sandy | 2-3 | 0-1 | ||||
| Aspear |
Mountain | Coarse | 2-3 | 0-1 | ||||
| Persim |
All Biomes | Sandy | 2-3 | 0-1 | ||||
| Razz |
Forest | Peat | 2-3 | 0-1 | ||||
| Bluk |
Mountain | Taiga | Coarse | 2-3 | 0-1 | |||
| Nanab |
Jungle | Swamp | Humid | 2-3 | 0-1 | |||
| Wepear |
Plains | Loamy | 2-3 | 0-1 | ||||
| Pinap |
Arid | Sandy | 2-3 | 0-1 | ||||
| Occa |
Jungle | Sandy | Thermal | Volcanic | Humid, Sandy | 1-3 | 0-1 | |
| Passho |
Coast | Freshwater | Island | Ocean | Humid, Sandy | 1-3 | 0-1 | |
| Wacan |
Grassland | Hills | Sky | Coarse, Loamy, Sandy | 1-3 | 0-1 | ||
| Rindo |
Jungle | Temperate | Lush | Humid, Loamy, Peat | 1-3 | 0-1 | ||
| Yache |
Freezing | Taiga | Coarse | 1-3 | 0-1 | |||
| Chople |
Mountain | Bamboo | Taiga | Coarse | 1-3 | 0-1 | ||
| Kebia |
Forest | Mushroom | Spooky | Swamp | Humid, Peat | 1-3 | 0-1 | |
| Shuca |
Arid | Grassland | Loamy, Sandy | 1-3 | 0-1 | |||
| Coba |
Peak | Temperate | Sky | Loamy, Peat | 1-3 | 0-1 | ||
| Payapa |
Desert | Floral | Magical | Savanna | Spooky | Loamy, Sandy | 1-3 | 0-1 |
| Tanga |
Forest | Jungle | Swamp | Humid, Peat | 1-3 | 0-1 | ||
| Charti |
Dripstone | Mountain | Sandy | Volcanic | Coarse, Sandy | 1-3 | 0-1 | |
| Kasib |
Dripstone | Lush | Spooky | Swamp | Taiga | Coarse, Humid | 1-3 | 0-1 |
| Haban |
Jungle | Magical | Mountain | Sky | Volcanic | Coarse, Humid | 1-3 | 0-1 |
| Colbur |
Badlands | Spooky | Taiga | Coarse, Sandy | 1-3 | 0-1 | ||
| Babiri |
Bamboo | Mountain | Taiga | Coarse | 1-3 | 0-1 | ||
| Chilan |
Temperate | Grassland | Loamy, Peat | 1-3 | 0-1 | |||
| Roseli |
Floral | Island | Magical | Mushroom | Loamy, Peat | 1-3 | 0-1 | |
Gallery
An Oran Berry tree.

A Cheri Berry tree.

A Chesto Berry tree.
A Pecha Berry tree.

A Rawst Berry tree.
An Aspear Berry tree.
A Persim Berry tree.

A Leppa Berry tree.

A Lum Berry tree.
A Figy Berry tree.
A Wiki Berry tree.
A Mago Berry tree.

An Aguav Berry tree.
An Iapapa Berry tree.
A Sitrus Berry tree.

A Touga Berry tree.
A Hopo Berry tree.
A Razz Berry tree.
A Bluk Berry tree.
A Nanab Berry tree.
A Wepear Berry tree.

A Pinap Berry tree.
A Cornn Berry tree.

A Magost Berry tree.

A Rabuta Berry tree.
A Nomel Berry tree.

A Spelon Berry tree.
A Pamtre Berry tree.

A Watmel Berry tree.
A Durin Berry tree.

A Belue Berry tree.

A Chilan Berry tree.
A Chople Berry tree.

A Coba Berry tree.

A Kebia Berry tree.

A Shuca Berry tree.
A Charti Berry tree.

A Tanga Berry tree.
A Kasib Berry tree.

A Babiri Berry tree.
An Occa Berry tree.
A Passho Berry tree.
A Rindo Berry tree.
A Wacan Berry tree.

A Payapa Berry tree.

A Yache Berry tree.
A Haban Berry tree.

A Colbur Berry tree.

A Roseli Berry tree.

A Pomeg Berry tree.

A Kelpsy Berry tree.

A Qualot Berry tree.
A Hondew Berry tree.
A Grepa Berry tree.

A Tamato Berry tree.
A Enigma Berry tree.
A Kee Berry tree.

A Maranga Berry tree.

A Liechi Berry tree.
A Ganlon Berry tree.

A Salac Berry tree.

A Petaya Berry tree.

A Apicot Berry tree.
A Lansat Berry tree.

A Starf Berry tree.

A Micle Berry tree.

A Custap Berry tree.

A Jaboca Berry tree.

A Rowap Berry tree.

An Eggant Berry tree.
.png)